7.27.2009

Daring Baker's Challenge: Cookies!

Not just any cookies, people, but two recipes for homemade versions of store-bought favorites. The July Daring Bakers' challenge was hosted by Nicole at Sweet Tooth. She chose Chocolate Covered Marshmallow Cookies (aka Mallomars) and Milan Cookies (aka Pepperidge Farm Milanos) from pastry chef Gale Gand as featured on her Food Network show, Sweet Dreams.

I may get in trouble for using their real names, but we can't go on pretending we were preparing something else here. While the challenge allowed for us to chose one or both of the recipes, I went with both: Milanos because they were a beloved childhood treat, and Mallomars because of the challenge in making marshmallow topped cookies dipped in chocolate.

Unfortunately, I found the "Milan" cookies a disappointment. They had a considerable amount of lemon extract in the recipe, and it proved too much for me. Not only did the cookies taste unlike their paper-cupped cousins, but they were texturally off - too chewy. While I probably wouldn't make these again, I wouldn't necessarily suggest that you shouldn't, I would only advise not to enter into the task expecting a certain kind of result. Let these cookies be what they are, not what you want them to be.


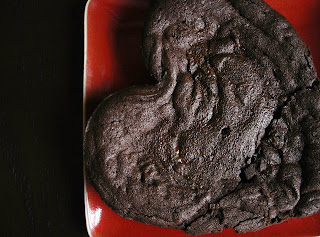
Now, as for the Mallomars, I had a completely different experience. Fun, challenging (but not too challenging), pretty messy (in a good way), super-cute and delicious. How can you not love all of that?

If you've ever made marshmallows before, you know they can be quite a task. Let me be specific, if you've only ever made marshmallows with egg whites (like myself), they can be extremely temperamental. I first made marshmallows many years ago, after catching some inspiration off of a Gourmet magazine cover and deciding to make a slew of cookie and candy treats for friends and family as holiday gifts. I think back then I was a bit less confident and followed recipes quite well; the marshmallows came off without a hitch. But since, every attempt at marshmallows, (among a few other things, let's be frank) has been hit and miss. I typically make them twice on every occasion because inevitably, on the first go, I overheat the sugar syrup and it won't blend properly (ahem, at all) into the whipped egg white, yielding lumps of hard candy in curdled egg foam rather than the anticipated sugary white fluff.

So imagine my delight when I found this recipe had no egg whites at all. And what a difference it makes! Not to mention, there is a touch of corn syrup in the melted sugar base that makes it next to impossible to crystallize the sugar when melting - another "issue" I've experienced from time to time. I dare call this marshmallow recipe infallible!


Now, piping the marshmallows on the cookies is where the messy part begins. All I can tell you is work quickly, 'cause the marshmallow starts to set fast, which means it just keeps getting stickier. And be prepared to get into things when it's time for dipping the cookies in chocolate, maybe I should say this is where the messy part begins. But it is fun, and quite simple, thought somewhat time consuming; and they're just so darned cute once sprung from their chocolate bath.


I made the cookies 1-inch rounds as the recipe specified, and I ended up with more than 6 dozen little cookies rather than "about 2 dozen" as the recipe stated. I must have rolled them thinner than recommended, which I must say, was just perfect, so if you're in a take-my-advice kind of mood, then halve the cookie recipe and roll them to about 3/16 of an inch. I know, so technical of me, and yes, that still gives you about three dozen cookies - which is fine because that's just about how many marshmallow kisses you'll have, too. Better still, at that size, they're poppers, as in, one bite, as in, you can eat half a dozen without blinking, as in, don't worry there's more.

Just what I need.
6.27.2009

Daring Bakers' Challenge: Bakewell Tart

Or is it a pudding? That's the great debate here with month's Daring Bakers' Challenge, the Bakewell Tart. The June Daring Bakers' challenge was hosted by Jasmine of Confessions of a Cardamom Addict and Annemarie of Ambrosia and Nectar. They chose a Traditional (UK) Bakewell Tart... er... pudding that was inspired by a rich baking history dating back to the 1800's in England.


Bakewell Tart History and Lore

Flan-like desserts that combine either sweet egg custard over candied fruit or feature spiced ground almonds in a pastry shell have Medieval roots. The term “Bakewell pudding” was first penned in 1826 by Meg Dods; 20 years later Eliza Acton published a recipe that featured a baked rich egg custard overtop 2cm of jam and noted,

“This pudding is famous not only in Derbyshire, but in several of our northern counties where it is usually served on all holiday occasions.”

By the latter half of the 1800s, the egg custard evolved into a frangipane-like filling; since then the quantity of jam decreased while the almond filling increased.

This tart, like many of the world's great foods has its own mythic beginnings…or several mythic beginnings. Legend has it in 1820 (or was it in the 1860s?) Mrs. Greaves, landlady of The White Horse Inn in Bakewell, Derbyshire (England), asked her cook to produce a pudding for her guests. Either her instructions could have been clearer or he should have paid better attention to what she said because what he made was not what she asked for. The cook spread the jam on top of the frangipane mixture rather than the other way around. Or maybe instead of a sweet rich shortcrust pastry case to hold the jam for a strawberry tart, he made a regular pastry and mixed the eggs and sugar separately and poured that over the jam—it depends upon which legend you follow.

Regardless of what the venerable Mrs. Greaves’ cook did or didn’t do, lore has it that her guests loved it and an ensuing pastry-clad industry was born. The town of Bakewell has since played host to many a sweet tooth in hopes of tasting the tart in its natural setting.

"Bakewell Tart History and Lore" is courtesy of Jasmine of Confessions of a Cardamom Addict, and Annemarie of Ambrosia and Nectar, where you can find even more juicy bits on the Bakewell Tart... er... Pudding.


Now, fortunately for me, I was ready to make this tart. I had just recently spent another day in Brentwood, picking cherries and apricots for jams, sauces, and the like, when along comes this challenge requiring, ahem, jam. Kismet, people.

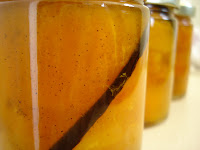
The hard part became deciding which kind of jam to use. I had white cherry, black cherry, and vanilla apricot. All of which would be perfect with almond, I might add. But wait, I just happen to have 4 mini springform pans that were given to me as a gift so many years ago I couldn't even tell you (not out of embarrassment but simple forgetfulness), that I've never before used. I know, shameful.


But it is my lucky day. And as such, I even had a relatively successful crust experience. (Me + crust usually = unhappy face.) I don't know that I would use these particular vessels for this purpose again (the crust was very difficult to arrange in such small, high-sided pans) but they did come out quite dashing if you don't mind me going English on you for a spell.


In the given recipe, the quantity of jam used was up to the user. I added the greater quantity recommended (1 cup - split between 4 tarts in my case) and must say that I would have liked a tad more. As pointed out above that even throughout the history of the recipe, the jam to almond filling ratio dwindled, I think I would have preferred the olden days. Yes, more jam, please. I found the filling to be quite sweet and jam provided the perfect foil.

Thank you ladies, for another delicious challenge!

Please see Confessions of a Cardamom Addict and Ambrosia and Nectar for the Bakewell Tart... er... Pudding recipe.


Apricots in Vanilla Honey Syrup
inspired by Christine Ferber

1 pound ripe apricots
1/2 cup sugar
2 oz honey
1 vanilla bean, split lengthwise

Wash apricots, cut in half and remove pits. In a large bowl gently combine apricots sugar, honey and vanilla bean. Cover with plastic wrap and allow to macerate under refrigeration at least 2 hours or overnight.

Drain apricots, reserving liquid. Heat liquid in a large non-reactive pot and boil gently until the syrup reaches 220 degrees. Add apricot halves and vanilla bean; bring to a boil and cook for approximately 5 minutes. Pack in jars and seal according to your preferred method, or transfer to a medium bowl and store in the refrigerator. Makes approximately 1 pint (16 ounces).

These apricots are delicious as a jam or could be used in myriad baking applications.

6.23.2009

Sweet Memories

Sometimes it's hard to remember. For me, I should say. But then there are some things that just stick. I, for one, have limited reserves up there in the ole noggin; I suppose not everything keeps because I'm holding on to some of that space for those memories that are lasting.


I don't remember when I tasted my first fresh apricot, but I always remembered not to buy them at the local grocery store, no matter how good they looked. It must have been something about that first one. (Now, dried apricots are a different thing. They're around at any time of year, and given the right kind - I prefer the tart, chewy California apricot halves over the sweet, squishy, whole Turkish apricots - they are utterly delicious.)

But then, only about a year ago, I found myself face to face with fresh apricots; this time, hanging from a tree. Now, those I do remember. And when I told a dear someone about these ambrosial stone fruits, her memory swept away to the childhood friend and afternoons roosted in an apricot tree; but by the end of the story, all I remembered was the part about the pie. During that time of year, when not lazily feasting on the sticky sweet bounty of that tree in which she was perched, her great-grandma (I guess that would be my great-great-grandma) made an apricot pie with halved apricots, face-up in milk, with maybe only a little flour and sugar to set things just right. Though she didn't remember the recipe, only watching it being made, she most certainly remembered loving everything about it.


I'm fortunate enough to have a history of some amazing cooks and bakers in my family lines. You haven't heard of any of them, but if they can create those kinds of memories in the minds of their children, grandchildren, and so forth, then that's all that matters. I have a few raggedy cookbooks filled with old recipes of ladies such as these, so naturally, I referred to them when trying to recreate this apricot milk pie. No luck, I have to say, but it seems the Pennsylvania Dutch have a milk pie within their culinary annals; just what I was looking for. Sometimes called Stingy, Flabby, or Poor Man's Pie, it is said to be a pie often made for children as a way to utilize leftover scraps of pie dough. Depending on the recipe, it is little more than milk, flour and sugar.


Pie crust and I don't really get along, so when I saw this recipe for "The Great Unshrinkable Sweet Tart Shell," I jumped on it - it was just perfect for me, as shrinking is probably my greatest ruin. I don't remember if I've ever had a crust shrink on me to such a degree as this. But I can't fault the recipe, I didn't follow it exactly I must say, I did rush things a bit, so here I would have to lay the responsibility on my impatience. But that's a whole 'nother story. The next time I make this pie, and believe me, there will be a next time, I would go with an unsweetened dough and I might even throw an egg yolk in there to make this more of a custardy pie (do watch the baking time and temperature if you decide to run with that one). Be sure to use ripe apricots; I leaned toward the less-ripe side because I love the tartness of apricots in that state, but I found that they were a bit too sour to marry well with the flavor of the milk custard.


Apricot Milk Tart
with help from Teri's Kitchen

1 unbaked 10" tart shell (use your favorite recipe)
14 perfectly ripe apricots (wouldn't hurt to have a few more for sampling purposes)
1 1/4 cup whole milk
1/2 cup all purpose flour
1/2 cup granulated sugar
Fresh nutmeg

Preheat oven to 400°

Wash and gently dry apricots. Cut them in half and remove the pits; arrange the apricots face up in the tart shell.

In a medium bowl wisk together milk, flour, and sugar. Pour mixture over and around apricots to fill the tart shell.

Bake for 20 minutes. Reduce oven to 350° and bake an additional 35 - 40 minutes. Remove from the oven and grate fresh nutmeg over the tart. Tart will appear wet in the center, but will set as it cools. Serve at room temperature.

At its best eaten within a day or two, and completely appropriate for breakfast.

6.15.2009

Old Yeller

You must think the worst of me. I can't seem to keep up with you, and when I do stop by, I'm just recycling old recipes. Wait, I haven't been doing that, I don't think. But it's never too late to start, right?

If it wasn't convincing enough the first time I mentioned it, that chocolate beet cake I made a not so long ago is well worth the effort. So much so, that when I got yellow beets in my veggie box last week, I thought they should have their fair shake at something sweet just the same. Actually, the whole thing was born out of the fact that the beet flavor in the chocolate cake was nearly undetectable. I began to wonder if it was because the chocolate covered something up, or simply that beets are meant to be used in cake. Obviously, I dreamt of the latter.


If you've been with me this whole time now (and, Thank You), you know that I've been trying (sort of) to restrain the creative impulses that lead me to abject failures. All I needed was one glint, one half spark, a little eek of hope that this yellow beet cake thing could be done. And there it was, a recipe for Golden Beet Cupcakes with Dulce De Leche Buttercream. Hooray!

Now, I didn't use that recipe, you should know; it only inspired me to go on with my own show. Here, I went for a plain golden vanilla cake, sans frosting. This cake is even better, more moist, and less beety on the second day, thought I would not think poorly of your impatience. (Admittedly, when warm, the aroma enhances the beet flavor, perhaps too much if not for a serious beet advocate.) A generous scatter of powdered sugar gives this cake a near-powdered-donut character, and you'll be pleased to know that beets just might be meant for cake.


Vanilla Beet Cake
inspired by Red Devil Cake and No Recipes


3 medium yellow beets
3 eggs
1 teaspoon Kosher salt
¾ cups sugar
¾ cups light brown sugar
6 tbsp butter, melted
2 teaspoons vanilla
2 cups flour
1½ teaspoons baking soda

Preheat oven to 350°. Butter a 9 in square or round pan.

Place beets in a small pot with and add cold water to cover; cook until fork tender (beets can be lifted, but easily fall, from a fork when pierced). Allow beets to cool until able to handle; cut ends from beets and slip skins off beets to peel. Puree beets in a food processor, and set aside (you will need 1½ cups of the puree).

In a large bowl, whisk together the eggs and Kosher salt. Add the sugars, butter, vanilla, and 1½ cups of beet puree; whisk until thoroughly combined.

In a separate bowl, combine the flour and baking soda; stir well with a whisk or fork. Add the dry ingredients to the wet ingredients a little at a time, whisking until smooth.

Pour the batter into the prepared pan and bake for 45 to 50 minutes, until a toothpick inserted in the center comes out nearly clean; the cake may look slightly underdone. Cool for at least 20 minutes before removing from the pan. This cake is best if cooled completely before serving, or even the next day.

5.27.2009

Daring Bakers' Challenge: Strudel

The May Daring Bakers’ challenge was hosted by Linda of make life sweeter! and Courtney of Coco Cooks. They chose Apple Strudel from the recipe book Kaffeehaus: Exquisite Desserts from the Classic Cafés of Vienna, Budapest and Prague by Rick Rodgers.

A long time ago, in a galaxy far, far away, I went to culinary school. In everyday life, I try to avoid this topic of conversation; my boastfulness is most enjoyed over imaginary accomplishments. Nonetheless, I did spend a few good years attempting to hone my craft. Or something like that.

Anyhow, I did have a few classes in the pastry wing during my tenure and within the dining hall of that building, only windows separated noshing students from a particular class of aspiring pastry chefs. Now, all cooks took a short class on baking, mine taught by a small, charmingly grumpy old Frenchman who muttered "I hate cooks" under his breath just often enough to keep everyone on their toes. And while we learned to make sponge cake, dinner rolls, and cookies, the class beyond that glass wall made puff pastry, yeasted doughs, and on one notable occasion, skillfully stretched dough tissue thin across two 6 foot tables joined end to end. It was truly impressive; I never before would have imagined such a thing possible.

Leave it to the Daring Bakers to bring it all back with strudel, May's challenge brought to us by Linda of make life sweeter! and Courtney of Coco Cooks. While we were given free reign with the filling, the strudel recipe itself is taken from Kaffeehaus: Exquisite Desserts from the Classic Cafés of Vienna, Budapest and Prague by Rick Rodgers.


Strudel is actually quite simple. The dough is little more than flour, water, and vinegar, and to my surprise, quite easily stretches to a paper thin sheet. True, I wasn't attempting a 12-foot length, but I did manage a fourth of that with no trouble. If you've stretched pizza dough before now, you can do this.


In the strudel recipe, it is recommended that you allow the dough to rest 30-90 minutes, but due to time constraints, mine rested overnight. It didn't seem to make any difference in flavor, though it may have added to its manageability. All in all, I find it simply an argument for patiently awaiting the 90 minutes to pass. It was suggested that we double the dough recipe in order to allow for some trial and error, but I got along so well, I ended up with two strudels. (Lucky me!) The original recipe contained an apple filling, though I chose to do both a cherry and a cannoli-like filling. While I felt that the ricotta filling was not nearly as successful as the cherry (the ricotta, in my opinion, became a tad rubbery), there were some huge advocates, and, at the very least, it would make a killer filling for (no mystery here) cannoli, but that's a different challenge.

For the complete strudel recipe, check out make life sweeter! and Coco Cooks. Thanks again, Ladies!


Cherry Lime Filling
inspired by cherry season

3 cups cherries, pitted and halved
½ cup sugar
Zest and juice of 1 lime
¼ tsp almond extract
Dash ground ginger
¼ cup walnuts, chopped fine
½ cup dry breadcrumbs

In a large nonstick pan, cook cherries and sugar until juice becomes very thick and syrupy (it should bubble vigorously and seem as if there is little juice left). Remove from heat and stir in lime zest, juice, almond extract, and ginger. Allow mixture to cool.

Combine walnuts and breadcrumbs; set aside.


Sweet Ricotta Filling
inspired by epicurious.com
and Daring Cooks’ May Challenge


1½ cups fresh ricotta
¼ cup sugar
½ tsp orange flower water
¾ cup bittersweet chocolate chips
Dash cinnamon

Combine all ingredients; mix well, set aside at room temperature until needed.

Do chill if you plan on using this filling for cannoli.

5.17.2009

Daring Cooks' Challenge: Ricotta Gnocchi

It seems the Daring Bakers have decided look beyond their ovens and hit the stovetop. Yes, we now have Daring Cooks out there, each ready and willing to tackle a monthly challenge. For the inaugural challenge, Lis and Ivonne, the founders of Daring Bakers, and now Daring Cooks (which have joined forces in the Daring Kitchen) have decided on Ricotta Gnocchi from The Zuni Cafe Cookbook by Judy Rodgers.


I am a huge fan of gnocchi, whether potato, semolina (double yum) or ricotta. So this challenge was a great pleasure to take to. On top of it all, I saw this as an opportunity to revive my currently defunct (but never forgotten) tribute to cheese, Serious Cheese. While I can't say that was successful (you haven't seen any new posts lately, have you?), it did get me thinking about how much I've missed making cheese.

Making ricotta is quite simple. It is the first cheese I ever made, way back when before I really even seriously dabbled in cheesemaking. It doesn't require any fancy equipment or ingredients, just milk, acid (lemon juice, vinegar, or citric acid) and heat. Oh, you will need some cheesecloth; but there are so many more uses for cheesecloth than cheese alone, and it's reusable, so a little goes a long way.

As for the ricotta gnocchi, they too are quite easy; here the trick is starting with a well-drained ricotta (Ms. Rodgers suggests testing the ricotta by placing a teaspoon or so on a paper towel; if after a few minutes you notice a large ring of dampness around the ricotta, it will need to be drained further). Beyond that, it could be that the most complicated part of this recipe is shaping the dumplings themselves.

While the recipe called for hands as the tool for the job, I chose to go with spoons. Okay, I'm gonna get all French on you now: quenelles. While many of you, I'm sure, know what a quenelle is, allow me to educate those who don't. Traditionally, a quenelle is a poached dumpling based on a forcemeat (finely ground mixture, typically of fish or meat), shaped into a three-sided oval using two spoons. More often than not, in the present, a quenelle refers to the oval shape itself, not the ingredients being manipulated.

Rooted in classical French cuisine, I'm sure you could imagine making a quenelle is no easy task. And I don't recommend you go into this quenelle thing thinking they'll look like they should, either. After some practice I'm still, well, practicing. But I can tell you it's worth the try; broaden your horizons and at the very least, you'll get beautiful dumplings, with or without sides.


Homemade Ricotta Cheese recipe via Serious Cheese


Please check out Lis or Ivonne's blogs to get the full recipe for Ricotta Gnocchi from The Zuni Cafe Cookbook.


4.27.2009

Daring Baker's Challenge: Abbey's Inspiring Cheesecake

The April 2009 challenge is hosted by Jenny from Jenny Bakes. She has chosen Abbey's Infamous Cheesecake as the challenge.

Ahhh, cheesecake. And not just any cheesecake, but any cheesecake. Yes, Jenny from Jenny Bakes brought us her friend Abbey's cheesecake recipe, and allowed us to play with it. (Thanks Abbey! Thanks Jenny!) And if there's anything you've learned about me, it's that I love to play with my food.

One of my all-time favorite desserts hails from Thailand: mango with sticky rice. I first met up with this idea while working at a Thai restaurant, quite a few years back, and have been obsessed ever since. It is, on its own, in and of itself, quite perfect.


I am fortunate to live not far from a favorite Thai restaurant offering the most sublime adaptation I've tasted yet. Soft, sweet, sticky rice, steaming hot and topped with just a dab of salty coconut sauce, sesame seeds and chilled slices of the most faultlessly ripe mango. It really is something else. Knowing I could never recreate this dish with such exacting detail (I'm really bad at choosing mangoes, for one), I have always dreamed up ways to bring these flavors together in a different expression.


And here we are, Coconut Mango Cheesecake. I chose a neutral crumb (Nilla Wafers) so as not to compete with the addition of sesame seeds. I also chose to use mangoes at a time when they're not yet at their best. (The favorite Thai restaurant won't even serve the favorite Thai dessert when the mangoes aren't just right.) I originally intended to somehow incorporate sticky rice into this cheesecake, though I never quite figured out how. I didn't give up, see, I just put a reign on the wild ideas this time around. That happens, every once in a while.


Sometimes I'm just so impatient for the right season to roll around. So, if you do what I did (and don't be coy, I know it happens from time to time), seek out The Perfect Purée of Napa Valley, they produce some of the finest fruit purees you can find. Obviously, in season fruit is best, but in a pinch or on the outskirts of that season, these purees are a great substitute. Just so you know, if I could have a do-over, I would've tried a little harder to get my hands on some.


Coconut Mango Cheesecake

Crust:
1¾ cups
Nilla Wafer crumbs
¼ cup sugar
2 tablespoons sesame seeds
4 oz (1 stick) unsalted butter, melted

Cheesecake:
3 – 8 oz packages cream cheese
½ cup sugar
1½ cups coconut cream (Coco Lopez or the like)
4 large eggs
1 teaspoon salt

Mango swirl:
1¼ cup mango
puree (approx. 2 mangoes)
1 egg yolk
½ cup sugar

Preheat oven to 350°

Mix together the crust ingredients until uniformly moist. Press into an even layer across the bottom and roughly halfway up the sides of a 10” springform pan. Set crust aside (in the freezer if you can).

Combine cream cheese, sugar, and coconut cream and beat together at low speed until smooth. Add eggs, one at a time, fully incorporating each one before adding the next. Be sure to scrape down the sides of the bowl in between each addition, this helps prevent lumps within the mixture. Set cheesecake filling aside.

Peel mangoes, and cut flesh away from the pit; puree in a food processor until smooth. Measure (roughly) 1¼ cups of the puree into a small bowl and add to it 1 egg yolk and ½ cup sugar; whisk together until fully incorporated.

Pour cheesecake batter into prepared crust. Dollop large spoonfuls of the mango puree over the surface of the cheesecake. To swirl: carefully dip the bowl of the spoon in and out of the cheesecake, pushing the mango puree slightly into the batter. Next, place the spoon, tip first, down into the batter, and swirl back and forth in circles. All the while, take care not to scrape the crust up into the cheesecake.

Bake for 55-65 minutes. It should still be rather wobbly, but not evidently liquid in the center, and it should not be firm at this point. Turn the oven heat off and allow the cheesecake to rest in the oven for another hour. After removing from the oven, allow the cheesecake to cool completely before refrigerating. Serve chilled.

4.19.2009

Daring Bakers' Challenge: Lasagne of Emilia Romagna

Here I am, with yet another Daring Bakers' challenge, overdue. Not out of idleness or neglect, no, this time it was the oven. (I swear.) And while I managed to bake a cake without one, this challenge was one project I couldn't tackle in its absence.

The March 2009 challenge was hosted by Mary of Beans and Caviar, Melinda of Melbourne Larder and Enza of Io Da Grande. They have chosen Lasagne of Emilia-Romagna from The Splendid Table by Lynne Rossetto Kasper as the challenge.

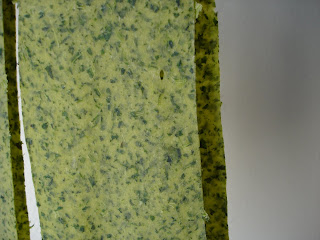
Fresh pasta is something that I love, but don't make...ever. I don't have a pasta machine, and while I am inclined to change that, I must admit there are quite a few other limited-use gadgets that I would prefer to find within the spatial limitations of my own kitchen. In other words, I was very happy to take on the challenge of making fresh pasta, completely by hand.


Yes, I know, I say that as if such a thing is a wondrous accomplishment, as though I have discovered the newest source of renewable energy or solved one of those mathematical equations that stumped everyone but the young, disgruntled janitor in that movie that everyone seems to love. And while it might be the everyday for some, and surely was for many more in the past, it is quite a feat for someone (me) who has adapted quite well to these times of convenience. I'll say it again, I made fresh pasta completely by hand. Now I'm just bragging.


Have I even told you how much I love this lasagne, specifically? Lasagne of Emilia-Romagna is over-the-top rich meets down-to-earth comfort. Imagine sheets of fresh spinach pasta layered between bechamel (a creamy white sauce) and a hearty meat ragu, finished with a browned and bubbly crust of Parmigiano Reggiano cheese. Try this once and you, too will understand.


This time around, I decided to put a twist on an old favorite. (Sure, this may have been the first time I've made this dish, but not the first time I've eaten it.) I went all vegetarian. I know, I know I talked all about meat sauce, and the meat sauce is part of what makes it in some ways, but this one turned out pretty darn alright if I may say. Still hearty, still decadent, and maybe even a little better for you. Believe you me, I'm no vegetarian, but taking a break from meat every now and again isn't such a bad thing.


But enough of that. Make this. Eat this. Love this. You will.

Thanks to Mary of Beans and Caviar, Melinda of Melbourne Larder and Enza of Io Da Grande, for testing the Daring Bakers' boundaries and getting me to make fresh pasta. (Please check out their blogs for the recipe for this challenge.)


Vegetable Ragu

1 yellow onion, finely diced
2 medium carrots, finely diced
1 bulb fennel, finely diced
2 celery ribs, finely diced
2 cloves garlic, chopped
4 cups vegetable broth, low sodium (or homemade)
29 oz can petit diced tomatoes
Flat leaf parsley, finely chopped
Kosher salt and freshly ground black pepper to taste

Heat a large heavy-bottomed pot over medium-high heat. Add olive oil, onions, carrots, fennel and sauté, stirring occasionally, until the vegetables are caramelized and begin to soften. Add celery and garlic and continue to cook until aromatic.

Add broth and reduce heat to just above a simmer. Add tomatoes and keep just at a simmer. Stirring occasionally, cook until the sauce is very thick or has reached the desired consistency.

Season with salt and pepper to taste and stir in the chopped parsley. Serve over polenta or with tender, homemade pasta.

3.25.2009

You Devil

While elbow deep amidst several components for a baking project I had planned last weekend, our oven decided to take a little vacation. I can't be too upset, the task could easily be put on hold, and the stove top works just fine, so this little interruption was simply nothing more. But then, the beets in my fridge started to call out for help; they were losing their muscle.

Now, I love beets. I haven't always, in fact, I think I hated them as a kid. More accurately, I avoided them. I'd like to think of myself as someone who will try anything, but I wasn't always that way (though I tell myself I was). So when I finally gave them a chance, I fell in love, with dirt (and that I did eat as a kid). I think beets taste more like the earth than anything else, and that is what I love, so much. A gift from the earth, and a sweet one at that. So kind of the earth to think of us, wouldn't you say? I love them most oven roasted in their skins, rubbed with oil and salt beforehand. Boiled beets just won't do.

Then what to do with a few sad, lonely beets and no oven? I was at a loss, so I turned to the website of the farm from whence I adopted these garnet jewels. And there it was, a recipe for chocolate beet cake. I had heard of this before, beets in cake. Carrots aren't unheard of, so what could be so wrong with beets?


Peel the beets, boil the beets, puree the beets. Mix together some eggs, sugar, oil, salt and vanilla, then add the beets. Now for the dry ingredients. Oh wait, I forgot to preheat the oven and prepare my pan.

Oh wait, I don't have an oven. This is what got me here in the first place.

Prepare the dry ingredients, don't combine just yet. Bring wet ingredients, dry ingredients, and cake pan to work tomorrow. Combine at work, pour into prepared pan, bake, cool, and enjoy.

While I don't suggest you follow the preceding method, I do suggest you give the following recipe a try. Simply delicious, decadently moist chocolate cake, with a dense crumb, yet light enough to enjoy more than one piece without pause. I may have found a new favorite way to have my beets.


Red Devil Cake
adapted “from a Mollie Katzen book”
via Mariquita Farms


3 medium red beets
3 eggs
1 teaspoon Kosher salt
1½ cups sugar
½ cup canola oil (or other neutral tasting oil)
1 teaspoon vanilla
1½ cups flour
¾ cups cocoa powder
1½ teaspoons baking soda

Preheat oven to 350°. Oil a 9 in square or round pan.

Peel and halve beets. Place in a small pot with and add cold water to cover; cook until fork tender (beets can be lifted, but easily fall, from a fork when pierced). Puree beets in a food processor, and set aside (you will need 2 cups of the puree).

In a large bowl, whisk together the eggs and Kosher salt. Add the sugar, oil, vanilla, and 2 cups of beet puree; whisk until thoroughly combined.

In a separate bowl, combine the flour, cocoa, and baking soda; stir well with a whisk or fork. Add the dry ingredients to the wet ingredients a little at a time, whisking until smooth.

Pour the batter into the prepared pan and bake for 45 to 50 minutes, until a knife inserted in the center comes out clean. Cool in the pan.

While delicious on its own, it would equally benefit from copious amounts of softly whipped cream.

2.28.2009

Daring Bakers' Challenge: Chocolate Valentino

Ahh, chocolate. If there was one month I would expect to do something with chocolate, it's February. And this month, we're having a go at flourless chocolate cake. The February 2009 challenge is hosted by Wendy of WMPE's blog and Dharm of Dad ~ Baker & Chef. They have chosen a Chocolate Valentino cake by Chef Wan; a Vanilla Ice Cream recipe from Dharm and a Vanilla Ice Cream recipe from Wendy as the challenge. (Though, truth be told, the ice cream flavor was less important to the challenge than the fact that it be homemade. Score!)


Now, I must say, this was quite a simple recipe, only three ingredients required. Does it sound like I'm complaining? Clearly, you misunderstand. I have confessed to a certain level of sluggishness before now, I believe. So yes, three ingredients, right up my alley. But here, as with any recipe lacking a laundry list of components, quality and technique are key. The chocolate has not a thing to hide behind, it is the recipe. And while chocolate may be the star, it wouldn't amount to much of anything without a stellar supporting cast. Butter and egg yolks provide moisture and richness in texture, as whipped egg whites provide the lift for this decadent chocolate creation.


For the ice cream, well, let's just say I'm going through a caramel (ahem, carmel) phase. Since the Caramel Cake of November's challenge, I have had this uncontrollable need to play with caramel. At times a loveless venture, occasionally afflicting a blind rage, I have become obsessed with caramel in general. (I haven't even told you about the Caramels from Alice Medrich that were an optional part of that November challenge. I've attempted them, twice, and while I haven't been successful, this is one challenge I plan to master. Someday.) And then there's the Salted Caramel ice cream at Bi-Rite Creamery in the Mission District of San Francisco. This frozen sweet makes silent all who hold it and jealous those who don't.


It's true the ice cream at Bi-Rite Creamery inspired the decision to go with this particular flavor. Unbeknownst to me, I was not alone in this love for salted caramel ice cream, and I'm late to catch on as well. I decided to go with a milk-only ice cream, rich with egg yolks. As if sparing the cream somehow made up for the highly indulgent flourless chocolate cake it would accompany. Ignorance is bliss.


Check out the blogs of our fearless hosts this month for the Chocolate Valentino recipe. As for the ice cream: if you don't have an ice cream maker (and simply don't live near Bi-Rite) you can still enjoy this frozen treat, and once again, for all things ice cream, David Lebovitz is your man.

It is important to use good salt in this recipe. Try fleur de sel or Maldon sea salt (or other mild-tasting sea salt); and even Kosher salt will do in a pinch, but ordinary fine table salt is far too harsh. If you don’t have salted butter, just use a little extra salt. Don’t forget, saltiness diminishes in foods as they get colder, so don’t be afraid that you’ve ruined anything if it tastes too salty before it’s frozen. That being said, don’t go crazy.


Salted Caramel Ice Cream
3 cups (750 ml) whole milk, divided evenly
1½ cups (300 gr) sugar
4 tablespoons (60 gr) salted butter
scant ½ teaspoon sea salt
5 large egg yolks
¾ teaspoon vanilla extract

Add sugar to a medium saucepan in an even layer. Heat the sugar over moderate heat until the edges begin to melt. Use a silicone spatula to gently stir the liquefied sugar from the bottom and edges towards the center, until all the sugar is dissolved. Continue to cook, stirring infrequently until the caramel starts smoking and begins to smell like it's just about to burn. Don’t worry about any undissolved lumps, what doesn’t dissolve will eventually or be strained out later.

Once caramelized, immediately remove from heat and stir in the butter and salt, until butter is melted, then gradually whisk in 1½ cups of milk (keep the other 1½ cups milk refrigerated until needed). The caramel may harden and seize, but return it to the heat and continue to stir over low heat until any hard caramel has melted.

Whisk the yolks in a small bowl and gradually pour some of the warm caramel mixture over the yolks, stirring constantly. Scrape the warmed yolks back into the saucepan and cook the custard using a silicone spatula, stirring constantly (scraping the bottom as you stir) until the mixture thickens. If using an instant-read thermometer, it should read 160°-170° F.

Pour the custard through a fine mesh sieve set over a medium bowl (1 qt or larger). Stir in the reserved cold milk and the vanilla. Refrigerate at least 8 hours, stirring occasionally, or until thoroughly chilled.

Freeze the mixture in your ice cream maker according to the manufacturer's instructions.

Eat right away, or chill in the freezer until firm.

1.29.2009

Daring Bakers' Challenge: Tuiles

Ahhh. A new year, a new challenge. This time around, we're talking the whisper thin lightness of tuiles. French for "tile," tuiles are traditionally thin, crisp cookies with a gently curved shape resembling that of, you guessed it (Didn't you?), a roofing tile.

This month's challenge is brought to us by Karen of Bake My Day and Zorra of 1x umruehren bitte aka Kochtopf. They have chosen Tuiles from The Chocolate Book by Angélique Schmeink and Nougatine and Chocolate Tuiles from Michel Roux. These lovely ladies were also kind enough to allow for a savory option with a recipe from Thomas Keller. And me being me, I resolved to go with a savory tuile, and beat my own drum while I was at it.

Years ago, a friend gave me a recipe for panelle, aka fabulously amazing chickpea fritter-like things. While very popular as Sicilian street fare, these were, for me, a new found food so delicious, I wondered what took me so long to find them. Then tuiles came to be the challenge du mois (of the month, people). The light bulb over my head burst and I decided on chickpea flour, the primary ingredient in panelle. And while I was unsure it would work, I couldn't stop myself from this possible brush with disaster.


So, imagine that (and my surprise). An actual experiment that did not go horribly South! Never mind that I yielded less than half of what I should have - I ate the "bad" ones (oops, that's broken, oops that's broken). Simple to make, delicious to eat, and so thin and light, you can hardly tell you're eating buttered chickpea flour. Now that's amazing.


Thank you Daring Bakers for another fabulous discovery in the world of baking! If you'd like to see the recipes, head on over to Bake My Day and take a look! If you'd like to know what I did, keep reading...


Savory Chickpea Tuiles
inspired by The French Laundry Cookbook


65 g/2.25 oz chickpea flour
1 Tbsp + 1 tsp sugar
1 tsp kosher salt
8 tablespoons unsalted butter, softened but still cool to the touch
2 large egg whites, cold

Preheat the oven to 400°

In a medium bowl, mix together the flour, sugar and salt. In a separate bowl, whisk the softened butter until it is completely smooth and mayonnaise-like in texture. Beat the egg whites into the dry ingredients with a whisk until completely incorporated and smooth. Whisk in the softened butter scraping the sides of the bowl as necessary and whisking until the batter is creamy and without any lumps. Transfer the batter to a smaller container, as it will be easier to work with.

Make 3, 2-inch hollow circular stencils spaced ½ inch apart (I used a thin plastic organizing folder). Place a Silpat (or similar) on a cool baking sheet. (If your baking sheet has raised edges, leave the Silpat on your counter and move it to the baking sheet just before baking.) Have a rounded surface such as a large-handled whisk or rolling pin clean and standing by.

Place the stencil in one corner of the sheet and, holding the stencil flat against the Silpat, scoop some of the batter onto the back of an offset spatula and spread it in an even layer over the stencil. Run the spatula across the surface of the stencil to remove any excess batter. Be sure not to leave any voids in the batter.

Lift the stencil and repeat the process, filling the Silpat while leaving about ½ inch in between the rounds.

Bake for approximately 3-4 minutes (watch the first couple of batches carefully to get the timing right), or until the batter is set and you see it rippling from the heat. There should be very light browning.

Remove the pan from the oven and, using a thin knife, transfer the tuiles to rest on the rounded surface. As the tuiles cool, they will lose their ability to bend, so work quickly.

Wipe the Silpat clean and allow it and the pan to cool before continuing with the next batch. Cooled tuiles may be stored in an airtight container for up to 2 days.

Promises, Promises

I feel like we've been here before. I went away. Disappeared. No note, no phone call, nada. Then, I come back, tossing apologies, promises for a new, different, more attentive person, and hoping that you'll stick around to see it.

Now, I won't blame you if you decide that it's just time for us to say goodbye, because, really, that would be, well, let's just say I'd understand. And I'm not going to say "But this time..." because I can't promise there won't be a next time.

But this time, I see so much in our future together. In fact, I even have some things to tell you about that I just couldn't seem to get to at the time. I've been stuck, you see, and not the kind of stuck that happens when you throw yourself against a velcro wall while wearing a velcro suit, but...come to think of it, that might be fun, in the beginning, anyway. And who could argue with that?

"Where have you been?!"
"Stuck on a velcro wall."
"Oh."

So, please. Do as you will, and I'll do as I do, and maybe we'll meet again, somewhere in the middle.