10.12.2008

Daring Baker's Challenge: Lavash Crackers

I have a few confessions to make here: a) this challenge actually took place in September, 2) this is the inaugural gluten-free/vegan challenge for the Daring Baker's, and lastly) I am so not good at following the directions. Not only am I late, but I'm also not prepared to talk gluten-free or vegan. This time around I have to work with what I've got.


And what I've got is wheat flour, yeast, salt, honey, and oil. The makings of a cracker, I'd say (or at least according to Peter Reinhart in The Bread Baker's Apprentice). In fact, these crackers are just plain simple. Easy to make, no question. Something I'd make again, and intend to, especially the gluten-free version.

In a mixer with a dough hook, you'll hardly break a sweat. But, if I may, 10 minutes (or so) of kneading the old fashioned way, let me just say, Zen! Meditation with the reward of food; exercise and relaxation, wrapped into the same ball of dough. And truly, time isn't your guide here, it's in the windowpane test. After about 8 minutes, when I felt I just couldn't knead any more, the windowpane test failed (I couldn't stretch the bread without it breaking), and I knew I had to go on. That's when I relaxed, lost myself in the process, and continued to knead. Clears the mind, really.

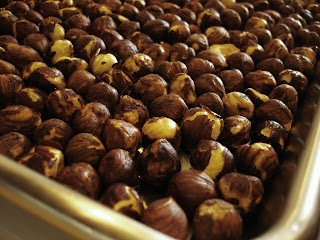
I topped these lovely crackers with seeds of poppy, cumin, caraway, sesame, and nigella, even found some dukkah (not a bad word, doo-kah, but an Egyptian nut, seed and spice blend) hiding in my cupboard. All delicious, but the dukkah did win me over (there's a great recipe for this blend over at 101 Cookbooks).


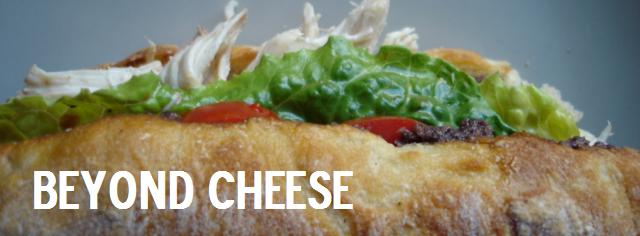
So where's the vegan part of the challenge? In the accompaniments, of course. What would go better with a crisp flat bread than some hummus, baba ghanoush, or in this case, a little mock Boursin? Yes, in my non-vegan, casein-loving ways, I went cheese spread. Please forgive me, 'cause this stuff is damn good.


And so many thanks to this month's challenge makers Natalie of Gluten A Go Go (with the full gluten-free recipe) and Shelly of Musings from the Fishbowl (with the part gluten-free, part non-gluten-free recipe). Without them, I may never have discovered this simple and delicious recipe that helped me knead away my woes. And don't forget to check out all those other Daring Bakers...with their crackers and dips. Good stuff, I tell you.
And I soon as I can remember how I made it...I'll tell you all about the cheese.

10.06.2008

When Life Gives You Sour Grapes

Welcome back. Or rather, sorry to keep you waiting. I won't mince words here: August was a tough month. And who am I kidding, where has September gone? In these past weeks, with many things to say, and no time to say it, came failed attempts at cooking up something worth talking about. There may have been a success (or two?), but we'll get into that another time.


As for the now, it's sour grapes. I have one rule when it comes to produce: if you've never before seen it, buy it. And that's how I came up with sour grapes. Clusters of firm, bright green jelly beans, they were. I snuck a taste; they snapped open between my teeth, quickly sending an acid-induced shock throughout my body. Good grief, what could I possibly do with these? Actually, I kinda liked it. Okay, I really liked it. They tasted like unsweetened sour candies in need of...sweetness.

After a brief investigation of these sour grapes, I found that they must have been none other than under ripe wine grapes, with which one could make verjus, a flavorful alternative to vinegar for use in savory sauces and the like. Still, sweeter is what I searched for, and I found not a shred of evidence that such a thing could be accomplished. And after these past months, I wasn't up for any more disappointments in my experimental efforts.

Jelly. I could do something with jelly. A cookie, a jelly-filled shortbread cookie, maybe a tart. Oh wait, I know, pâte de fruit. Sure, maybe it had taken a couple of days, and countless hours searching for the appropriate cookie recipe before it even dawned on me. But why not those jewel-like candies of firm fruit jelly dusted in sugar? Tart and sweet and not too firm by the end of it all (overly toothsome pâte de fruit I find unappealing, you should know). Perfect. Life's not so sour after all.


The sugar used for dusting is important. I used evaporated cane juice. Don't make the same mistake, it melts on the surface of the candies within minutes; use regular white cane sugar. And if you prefer, many pâte de fruit recipes out there call for pectin rather than gelatin (like this, and that).


Sour Grape Gelées
adapted from epicurious.com

½ pound sour grapes
4 (¼ ounce) envelopes unflavored gelatin
1 cup water
2 cups sugar plus additional for tossing

8-inch square nonstick baking pan, lightly oiled

Wash and stem grapes. Puree sour grapes in a food processor and transfer to a fine meshed strainer; press on solids to extract as much pulp as possible, leaving only skins behind. You should have ¾ cup of pulp in the end (add water or applesauce/apple puree to supplement if necessary).

Add the water to a 2-quart heavy saucepan; sprinkle the gleatin evenly over the surface of the water and let stand several minutes to soften. Heat gelatin over medium-low heat, stirring, until dissolved; add sugar and stir until dissolved.

Bring the mixture to a boil over medium-high heat. Reduce heat again to medium-low and boil, uncovered, without stirring, 13 minutes (watch carefully so that mixture does not boil over). Remove from heat and allow the mixture to stand for 5 minutes, skimming and foam that may remain on the surface. Stir in sour grape puree (do not scrape up any bits that may have settled on the bottom of the pan), and pour into the prepared baking pan. Let stand at room temperature until set, at least 12 hours.

Run a sharp knife around the edge of the gelatin and invert onto a cutting board. Cut into 1/2-inch-wide strips, then cut strips into 1-inch pieces. Just before serving, gently toss gelées in a bowl of sugar to coat, brushing off excess.

Gelées, without sugar coating, keep in an airtight container at cool room temperature 2 weeks.

8.31.2008

Daring Bakers' Challenge: Chocolate Éclairs

Yes, it's that time again. Another Daring attempt at something I think I already know. I do not intend to imply that I'm an expert of sorts, but I do tend to approach these things with the old hat mentality - will I ever learn? But, I was thrilled to see this month's Daring Bakers' Challenge, selected by Meeta of What's for Lunch, Honey? (with a little help from Tony of Olive Juice): Chocolate Éclairs from Chocolate Desserts by Pierre Hermé.


Éclairs, mmmm...oh, and profiteroles, cream puffs and gougères. Whatever your pleasure, they all have a common thread: choux pastry, or pâte à choux. I love this stuff; it's a buttery, floury paste that bakes (and poaches, and fries) up into a big puffy vessel for myriad filling choices, and in this case, a rich chocolate pastry cream.


One side of me (I don't know which) is a traditionalist, and really felt that only a vanilla pastry cream would do. But the other side convinced me that just sticking with the provided recipe was the way to go on this particular occasion. And so I did...and it turned out the most decadent chocolate pastry cream, I think ever. Not only that, but this recipe provided little fuss, which is great because the real fuss came later.

But let's go back to the choux pastry. I have made it before. I don't remember when, or how, or why, but I also don't remember having problems with it. And I didn't at first, this time around, until they were done, or should I say, until I thought they were done. They puffed up beautifully, I was so proud. When I took them out of the oven to admire them (and let them cool), they sank rapidly; their domed tops caving into deep crevices. What did I do? Well, with hindsight, I'm certain I didn't cook them long enough; though I did cook them longer than the recipe called for, they were still slightly doughy inside. After consulting various other recipes for choux pastry, I found that the requisite times and temperatures vary greatly; apparently, I'm just supposed to know. And I thought I did, which once again, is my Achille's heel. Okay, okay, next time I'll know everything.


And then (always a then) the chocolate glaze; I won't bore you with the details, save a few. To start, the chocolate glaze that tops the éclairs called for a chocolate sauce in the recipe. Seriously? I have to make a chocolate sauce, just so I can use a tiny bit of it in the glaze? Now, now, I'm following the recipe, remember? So I did it; I made the chocolate sauce to go in the chocolate glaze. And then the glaze turned into this mucky, broken, buttery mess. I ended up using the chocolate sauce alone to glaze the éclairs. See? Good thing I followed the recipe, or I wouldn't have had anything to fall back on.


How did they turn out, you ask? Aside from having only a small handful of éclairs that actually turned out to be attractive specimens (the profiterole-style puffs turned out much better), they tasted just as they should. They make for messy eating (as I think all éclairs do, see below), and would give any chocolate fiend their fix. Though in my case, as someone who eats her mistakes, it's safe to say I've completely OD'd.


For the recipe, take a look at What's for Lunch, Honey? To see more Daring Bakers in action, check out the Daring Bakers' Blogroll. Until next time...!


How not to eat an éclair...
A coworker with whom I shared an affinity for pure, unadulterated evil (baked goods) once brought me an éclair from a local bakery she had been raving about. Now, I did not work a desk job, but I did have work at a desk from time to time. So after the rush of the day had passed, I retired to said desk, closed the door to my shared office, and sat down to enjoy this, some might say gargantuan, éclair.

I raised it to my lips and bit into just the very tip; at once the entire contents of the pastry shot out of the other end and onto the lapel of my suit. While another might take pause to clean the offending filling from their clothing, I did not. The damage had already been done, I thought. So I changed position, leaning further out of my chair to take a second bite. Still, more (How can there be more?) pastry cream shot out of the back end, falling through my outstretched fingers and onto my shoe. I will not be done in by an éclair, I thought. And with the third, showstopping bite, I had pastry cream on both hands, my face, suit, shoes, desk, and computer. Attempting to clean oneself and their surroundings when covered entirely in stickiness is quite a feat. Oh, I am so thankful I was working alone that day.

7.30.2008

Daring Bakers' Challenge: Filbert Gâteau

And this month, brought to us by the Daring Mele Cotte, we have a Filbert Gâteau with Praline Buttercream from Great Cakes by Carol Walter. Layers of nutty cake and sweet buttercream enrobed in dark chocolate ganache; this cake is similar in technique to the Opera Cake we made just a couple of short months ago, with a few steps more.


Take one look at the recipe, and you just might run screaming from the kitchen. It is a rather daunting task, this cake. So many components, each prepared on their own. And, wait a second, I have to make my own praline paste? Not to mention, I see another scuffle with buttercream coming on, only this time I will win.

Oh, buttercream. I was ready to fall back on the cooked sugar syrup version of a Swiss buttercream that I have executed in the past. For some reason, I was weary of the cooked egg white and sugar technique of this recipe, but I resigned myself to it and carried on. And with hindsight (always so clever, that hindsight): much easier, I must say. In this method, egg whites are beaten until foamy, sugar is added, and the mixture is cooked over a hot water bath just until it reaches 120 degrees. Don't make the same mistake I did; when it comes to temperature, remove it from the heat immediately once it reaches the correct temperature (in fact, it may behoove you to remove it from the heat perhaps one or two degrees short of that), as the egg whites will continue to cook before cooling by way of being whipped into an airy fluff.


Now, the making of hazelnut praline is an entirely different story. While I am happy to say I have done so, I probably would not choose to again. There is a certain sense of accomplishment in something such as a praline paste (toast and skin hazelnuts, make a caramel, add hazelnuts, let it cool, puree it forever, and call it done - not exactly simple), but I have to say I've had much better. Commercially available praline paste has a much smoother, richer texture, like a super sweet, caramelized peanut butter, or in this case, hazelnut butter. Mine came out more like a nutty sugar paste. I was nervous; would this ruin my buttercream? Thankfully, no, the sugar in the praline paste actually dissolved away in the mix, resulting in the toasty sweet nutty buttercream I hoped for.


The cake itself was not as challenging as it was messy. Again, this is similar in technique to the almond sponge of the Opera Cake, only, you guessed it, hazelnuts instead. This requires toasting hazelnuts, rubbing the skin from the toasted hazelnuts, and processing them with a small amount of flour and cornstarch. Then you beat together egg yolks and sugar, then you beat together egg whites and sugar, and clarify some butter while you're at it. (How many bowls is that so far? I dunno, don't lose focus!) Now combine the eggs, then quickly sprinkle in the nut meal (Work fast! Use a whisk! Don't deflate the batter!), add the clarified butter, pour the batter into the prepared baking pan, and get it in the oven, all within a few minutes. Phew. Needless to say, cleaning up the remains of the process was a project in and of itself.

I didn't have a round cake pan, so I used a springform pan with excellent results. And then I had to cut the cake. Yes, it's time to assemble all of these components. Some said twine was the answer, others said that toothpicks could be your guide. But stubborn me thought I could split the cake into three perfectly straight and level layers, no problem. I just didn't know I needed a practice cake first. The first slice, a bit wobbly; the second cut, some improvement shown. Where's that practice cake?


Now: cake, sugar syrup, buttercream, repeat. This recipe did call for a layer of whipped cream after the buttercream, but I am terribly forgetful, and I wasn't about to take my cake apart to remedy the situation. Next would be the ganache coating. For this step I was most excited. The result is a beautifully shiny, perfectly enrobed cake. I've never executed a successful ganache coating (chocolate and cream, mostly) and, well, I still haven't. In this instance, I let the ganache cool too much before pouring it over the cake; it became a spreadable chocolate coating. Sure, it looked nice and shiny, until the cake was fully chilled, that is.


Well, it's been fun. Yes, frustrating, and I dirtied every bowl and kitchen appliance several times over, but still fun. I tried something I haven't before, and though I didn't succeed (ahem, ganache) I wouldn't have given it a shot otherwise. Thanks again, you Daring ones.

If you'd like to see the actual recipe, take a look at Mele Cotte. And, if you'd like to see some other great cakes, check out the Daring Bakers' Blogroll, where you'll find hundreds of other participating bakers.

7.20.2008

An Incredible Egg

I want to tell you a story. It's about a farm with stretching pastures, rolling hills, and wandering chickens. Happy chickens, I'll bet. Here, they scratch and peck, feeding off the fresh green shoots of the newly grazed grass left behind by their neighboring cattle.


It's Marin Sun Farms. A little utopia of a farm where the land and animals are treated as precious rather than commodity. It's the kind of place I simply wish there were more of.


Fresh eggs from Marin Sun Farms are among the most beautiful I've ever seen. Colorful, hardy shells give way to show a rich golden yolk, so thick and rich in flavor. And to David and his chickens, I say thank you for your gift.


7.18.2008

Plum Puckered

What does one do with a prolific plum tree? If only I had one to tell you about. Oh, but I do know someone who does, and with those plums, I made jam. I have been in quite a jammy mood lately, I have.


Turning fruit into jam is one of cooking's greatest permutations. Though not the same, the fresh sort and its simmered variant, neither is any less delicious. True, you can not mimic the flavor of a fresh, perfectly ripe, still warm from the sun specimen that dribbles juice down your chin if you're not careful, but there is something to be said for trying to hold on to that perception beyond the summer months.


But now, what to do with this jam? Its bittersweet, translucent jewel-like quality should not be limited only to toast; not that toast is unworthy, or a lesser vessel. What I mean is, few things celebrate a lovely jam better than the thumbprint cookie. Buttery, shortbread rounds with a dimple full of tart jam. Can't think of a better way to use up those plums.


And with what's left, I highly recommend trying the plum sorbet. Delicious.


This was so simple...plums, sugar, heat, and voila. Such sweet and juicy fruit; what remained was so very little (be prepared). I left the skins out for fear the jam too bitter, and to my surprise, it was still very much so. And what a sweet surprise, it mellowed after a few nights rest.


Plum Jam
yields about 1 ½ cups

3 cups plums, peeled and pitted
½ - 1 cup sugar (or to taste)

Simmer fruit and sugar in a medium pot over low heat, stirring occasionally to prevent scorching, until the fruit has thickened well enough to round up on a spoon.

Enjoy fully with warm toast or in your favorite thumbprint cookie.


Buttery Thumbprints with Plum Jam
adapted from marthastewart.com

1 stick unsalted butter, room temperature
1/2 cup sugar
1 egg yolk
1 teaspoon pure vanilla extract
1 cup plus 2 Tbsp all-purpose flour
2 Tbsp cornstarch
1/2 cup plum jam (any flavor jam will do)

Preheat oven to 350°

Combine butter and sugar in a medium to large bowl; beat together until light and fluffy. Add egg yolk and vanilla; beat well. Whisk together flour, cornstarch, and salt; add to the moist ingredients and mix just until combined.

Roll dough into ½ -inch balls; place on a parchment-lined baking sheet. Make a deep indentation in the center of each ball with your thumb.

Bake for 10 minutes, remove from oven, and lightly press the centers down again. Fill the center of each cookie with about ½ - 1 teaspoon of jam. Return to the oven and bake about 10 to 12 minutes more. The cookies should only show signs of light browning on the bottom and still remain a golden buttery color atop.

Place on a wire rack to cool. While it is tempting to sample cookies fresh from the oven, the jam will be screaming hot, so give them a few moments. This recipe makes about 3 dozen, depending on the size of your thumbprint.

7.01.2008

Midnight Canning

So much fruit. Pounds and pounds of fruit. At the time, I was simply relishing the joy of finding yet another "one" on the tree. How did it become so much?


Years ago, I entertained the notion of canning. It sounded like such a grand idea, preserving the best of the season to be enjoyed year round or, even better, being able to give the gift of jam. That was ages ago. But today, I have over 30 pounds of fruit (it seems) on my kitchen countertop. I'd better get started.


Blenheim apricot jam. Sweet little apricots, they are; even moreso in the jar. White nectarine preserves, stone fruit butter, peaches and more peaches, what about the rest? Looks like I'll need more jars.


Preservation is an art, somewhat lost. But really, it is so simple, I don't know what took me so long to come around. And I have so much to look forward to, lovely summer fruit for months to come.


As (surprise!) I was not prepared to preserve such a mountain of fruit, I wasn't able to find all of the accoutrements (aside from lids and jars) at the last minute. While I got by with a pair of tongs and crossed fingers, I highly recommend, at the very least, scoring an actual jar lifter that is intended to do the job of lifting hot jars in and out of boiling water. Also, if you only have one large pot, you can get by: after filling jars, return to the same pot, crank up the heat, and start the timer after the water comes back up to a boil.

For more information, please refer to the veritable authority on American home canning at freshpreserving.com. Or, for truly extensive information, including a completely different take on the role of sugar in canning, take a look at this from Colorado State University.


Stone Fruit Butter
yields about 2 pints

4 pounds stone fruit (such as peaches, apricots, and nectarines), peeled and sliced
½ cup sugar
Juice of 1-2 lemons


Simmer cut fruit and sugar in a medium saucepot until fruit has softened; puree fruit.
Continue to cook over low heat, stirring occasionally to prevent scorching, until the fruit has thickened well enough to round up on a spoon. Add lemon juice (to taste) to brighten the flavor.

Enjoy fully with warm toast.


For preservation:

Fill a large pot with enough water to cover jars by at least 1-2 inches.

In a second pot, fully submerge 2 clean pint jars (or 4 x ½ pints), and new, unused lids in 180° degree water for at least ten minutes prior to filling; keep the bands clean and to the side. Remove jars from hot water as needed.

Ladle warm butter into hot jars, leaving ¼” headspace at the top of the jar. Remove any air bubbles by sliding a plastic (non-metal) spatula between the jar and the fruit; clean away any fruit butter from the rims of the jars. Set the lids onto the jars and screw on the bands just until firm and snug, do not try to make it as tight as you can. Carefully lower jars into pot of boiling water, cover and process for 10 minutes.

After 10 minutes has passed, take the pot from the heat and allow the jars to rest for 5 minutes before removing, this will help with any temperature shock that could potentially damage the jars.

Remove jars, set upright with 1-2 inches of space between the jars; allow to cool for 12-24 hours. After cooling, check for a seal by removing the bands and attempting to pop off the lid with your hands; you should not be able to do so. Upon passing the seal-check, replace band and store jars in a cool, dry place for up to 1 year. If instead the lid pops open, all steps, including reheating the butter, should be repeated.