7.30.2008

Daring Bakers' Challenge: Filbert Gâteau

And this month, brought to us by the Daring Mele Cotte, we have a Filbert Gâteau with Praline Buttercream from Great Cakes by Carol Walter. Layers of nutty cake and sweet buttercream enrobed in dark chocolate ganache; this cake is similar in technique to the Opera Cake we made just a couple of short months ago, with a few steps more.


Take one look at the recipe, and you just might run screaming from the kitchen. It is a rather daunting task, this cake. So many components, each prepared on their own. And, wait a second, I have to make my own praline paste? Not to mention, I see another scuffle with buttercream coming on, only this time I will win.

Oh, buttercream. I was ready to fall back on the cooked sugar syrup version of a Swiss buttercream that I have executed in the past. For some reason, I was weary of the cooked egg white and sugar technique of this recipe, but I resigned myself to it and carried on. And with hindsight (always so clever, that hindsight): much easier, I must say. In this method, egg whites are beaten until foamy, sugar is added, and the mixture is cooked over a hot water bath just until it reaches 120 degrees. Don't make the same mistake I did; when it comes to temperature, remove it from the heat immediately once it reaches the correct temperature (in fact, it may behoove you to remove it from the heat perhaps one or two degrees short of that), as the egg whites will continue to cook before cooling by way of being whipped into an airy fluff.


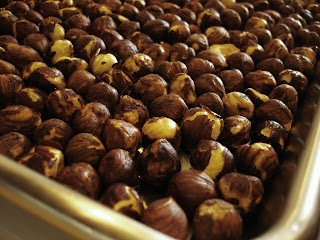
Now, the making of hazelnut praline is an entirely different story. While I am happy to say I have done so, I probably would not choose to again. There is a certain sense of accomplishment in something such as a praline paste (toast and skin hazelnuts, make a caramel, add hazelnuts, let it cool, puree it forever, and call it done - not exactly simple), but I have to say I've had much better. Commercially available praline paste has a much smoother, richer texture, like a super sweet, caramelized peanut butter, or in this case, hazelnut butter. Mine came out more like a nutty sugar paste. I was nervous; would this ruin my buttercream? Thankfully, no, the sugar in the praline paste actually dissolved away in the mix, resulting in the toasty sweet nutty buttercream I hoped for.


The cake itself was not as challenging as it was messy. Again, this is similar in technique to the almond sponge of the Opera Cake, only, you guessed it, hazelnuts instead. This requires toasting hazelnuts, rubbing the skin from the toasted hazelnuts, and processing them with a small amount of flour and cornstarch. Then you beat together egg yolks and sugar, then you beat together egg whites and sugar, and clarify some butter while you're at it. (How many bowls is that so far? I dunno, don't lose focus!) Now combine the eggs, then quickly sprinkle in the nut meal (Work fast! Use a whisk! Don't deflate the batter!), add the clarified butter, pour the batter into the prepared baking pan, and get it in the oven, all within a few minutes. Phew. Needless to say, cleaning up the remains of the process was a project in and of itself.

I didn't have a round cake pan, so I used a springform pan with excellent results. And then I had to cut the cake. Yes, it's time to assemble all of these components. Some said twine was the answer, others said that toothpicks could be your guide. But stubborn me thought I could split the cake into three perfectly straight and level layers, no problem. I just didn't know I needed a practice cake first. The first slice, a bit wobbly; the second cut, some improvement shown. Where's that practice cake?


Now: cake, sugar syrup, buttercream, repeat. This recipe did call for a layer of whipped cream after the buttercream, but I am terribly forgetful, and I wasn't about to take my cake apart to remedy the situation. Next would be the ganache coating. For this step I was most excited. The result is a beautifully shiny, perfectly enrobed cake. I've never executed a successful ganache coating (chocolate and cream, mostly) and, well, I still haven't. In this instance, I let the ganache cool too much before pouring it over the cake; it became a spreadable chocolate coating. Sure, it looked nice and shiny, until the cake was fully chilled, that is.


Well, it's been fun. Yes, frustrating, and I dirtied every bowl and kitchen appliance several times over, but still fun. I tried something I haven't before, and though I didn't succeed (ahem, ganache) I wouldn't have given it a shot otherwise. Thanks again, you Daring ones.

If you'd like to see the actual recipe, take a look at Mele Cotte. And, if you'd like to see some other great cakes, check out the Daring Bakers' Blogroll, where you'll find hundreds of other participating bakers.

7.20.2008

An Incredible Egg

I want to tell you a story. It's about a farm with stretching pastures, rolling hills, and wandering chickens. Happy chickens, I'll bet. Here, they scratch and peck, feeding off the fresh green shoots of the newly grazed grass left behind by their neighboring cattle.


It's Marin Sun Farms. A little utopia of a farm where the land and animals are treated as precious rather than commodity. It's the kind of place I simply wish there were more of.


Fresh eggs from Marin Sun Farms are among the most beautiful I've ever seen. Colorful, hardy shells give way to show a rich golden yolk, so thick and rich in flavor. And to David and his chickens, I say thank you for your gift.


7.18.2008

Plum Puckered

What does one do with a prolific plum tree? If only I had one to tell you about. Oh, but I do know someone who does, and with those plums, I made jam. I have been in quite a jammy mood lately, I have.


Turning fruit into jam is one of cooking's greatest permutations. Though not the same, the fresh sort and its simmered variant, neither is any less delicious. True, you can not mimic the flavor of a fresh, perfectly ripe, still warm from the sun specimen that dribbles juice down your chin if you're not careful, but there is something to be said for trying to hold on to that perception beyond the summer months.


But now, what to do with this jam? Its bittersweet, translucent jewel-like quality should not be limited only to toast; not that toast is unworthy, or a lesser vessel. What I mean is, few things celebrate a lovely jam better than the thumbprint cookie. Buttery, shortbread rounds with a dimple full of tart jam. Can't think of a better way to use up those plums.


And with what's left, I highly recommend trying the plum sorbet. Delicious.


This was so simple...plums, sugar, heat, and voila. Such sweet and juicy fruit; what remained was so very little (be prepared). I left the skins out for fear the jam too bitter, and to my surprise, it was still very much so. And what a sweet surprise, it mellowed after a few nights rest.


Plum Jam
yields about 1 ½ cups

3 cups plums, peeled and pitted
½ - 1 cup sugar (or to taste)

Simmer fruit and sugar in a medium pot over low heat, stirring occasionally to prevent scorching, until the fruit has thickened well enough to round up on a spoon.

Enjoy fully with warm toast or in your favorite thumbprint cookie.


Buttery Thumbprints with Plum Jam
adapted from marthastewart.com

1 stick unsalted butter, room temperature
1/2 cup sugar
1 egg yolk
1 teaspoon pure vanilla extract
1 cup plus 2 Tbsp all-purpose flour
2 Tbsp cornstarch
1/2 cup plum jam (any flavor jam will do)

Preheat oven to 350°

Combine butter and sugar in a medium to large bowl; beat together until light and fluffy. Add egg yolk and vanilla; beat well. Whisk together flour, cornstarch, and salt; add to the moist ingredients and mix just until combined.

Roll dough into ½ -inch balls; place on a parchment-lined baking sheet. Make a deep indentation in the center of each ball with your thumb.

Bake for 10 minutes, remove from oven, and lightly press the centers down again. Fill the center of each cookie with about ½ - 1 teaspoon of jam. Return to the oven and bake about 10 to 12 minutes more. The cookies should only show signs of light browning on the bottom and still remain a golden buttery color atop.

Place on a wire rack to cool. While it is tempting to sample cookies fresh from the oven, the jam will be screaming hot, so give them a few moments. This recipe makes about 3 dozen, depending on the size of your thumbprint.

7.01.2008

Midnight Canning

So much fruit. Pounds and pounds of fruit. At the time, I was simply relishing the joy of finding yet another "one" on the tree. How did it become so much?


Years ago, I entertained the notion of canning. It sounded like such a grand idea, preserving the best of the season to be enjoyed year round or, even better, being able to give the gift of jam. That was ages ago. But today, I have over 30 pounds of fruit (it seems) on my kitchen countertop. I'd better get started.


Blenheim apricot jam. Sweet little apricots, they are; even moreso in the jar. White nectarine preserves, stone fruit butter, peaches and more peaches, what about the rest? Looks like I'll need more jars.


Preservation is an art, somewhat lost. But really, it is so simple, I don't know what took me so long to come around. And I have so much to look forward to, lovely summer fruit for months to come.


As (surprise!) I was not prepared to preserve such a mountain of fruit, I wasn't able to find all of the accoutrements (aside from lids and jars) at the last minute. While I got by with a pair of tongs and crossed fingers, I highly recommend, at the very least, scoring an actual jar lifter that is intended to do the job of lifting hot jars in and out of boiling water. Also, if you only have one large pot, you can get by: after filling jars, return to the same pot, crank up the heat, and start the timer after the water comes back up to a boil.

For more information, please refer to the veritable authority on American home canning at freshpreserving.com. Or, for truly extensive information, including a completely different take on the role of sugar in canning, take a look at this from Colorado State University.


Stone Fruit Butter
yields about 2 pints

4 pounds stone fruit (such as peaches, apricots, and nectarines), peeled and sliced
½ cup sugar
Juice of 1-2 lemons


Simmer cut fruit and sugar in a medium saucepot until fruit has softened; puree fruit.
Continue to cook over low heat, stirring occasionally to prevent scorching, until the fruit has thickened well enough to round up on a spoon. Add lemon juice (to taste) to brighten the flavor.

Enjoy fully with warm toast.


For preservation:

Fill a large pot with enough water to cover jars by at least 1-2 inches.

In a second pot, fully submerge 2 clean pint jars (or 4 x ½ pints), and new, unused lids in 180° degree water for at least ten minutes prior to filling; keep the bands clean and to the side. Remove jars from hot water as needed.

Ladle warm butter into hot jars, leaving ¼” headspace at the top of the jar. Remove any air bubbles by sliding a plastic (non-metal) spatula between the jar and the fruit; clean away any fruit butter from the rims of the jars. Set the lids onto the jars and screw on the bands just until firm and snug, do not try to make it as tight as you can. Carefully lower jars into pot of boiling water, cover and process for 10 minutes.

After 10 minutes has passed, take the pot from the heat and allow the jars to rest for 5 minutes before removing, this will help with any temperature shock that could potentially damage the jars.

Remove jars, set upright with 1-2 inches of space between the jars; allow to cool for 12-24 hours. After cooling, check for a seal by removing the bands and attempting to pop off the lid with your hands; you should not be able to do so. Upon passing the seal-check, replace band and store jars in a cool, dry place for up to 1 year. If instead the lid pops open, all steps, including reheating the butter, should be repeated.